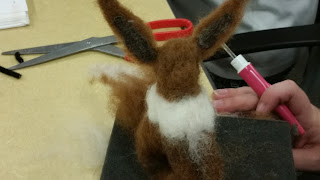
Our local library offers free classes twice a month. This month was needle felting. The teacher brought in these samples to inspire us. We started by creating a simple armature with pipe cleaners. they just added wool roving and started poking. The felting needles have barbs to catch and secure the fibers to create felt.
This is the bear i created. i added a bit more "fur" to make him even more defined. it was surprisingly easy to do.
here are some of the other student's work in progress:
a horse
a lamb/sheep with curly wool fur
a bunny
a pig
? anteater?
bear
sheep
this became a purple bear - just needs a head
bear
A couple of weeks later was our second felting class. This one was all about "wet" felting. We were given a pool noodle, some bubble wrap, some soapy liquid and our choice of wool roving.
You start by creating a mat of roving - alternating directions for strength. then you roll it up in the bubble wrap and a piece of netting. then you add the soapy liquid and rub.
Here is another student's mat before it got wet.
them you around the pool noodle. You roll and roll and roll and roll some more.
The roving eventually joins together to create felt - but it is not yet strong enough.
The final step is to soak it in hot water and wring it out. rinse in cold water, then hot then cold again.
If you have blank spots or want to add some colour - you can use the needle felting technique to add more roving to your piece.
Here are some other student's work:
All in all - two fun and informative classes. do i want to buy all the supplies and start creating felt animals and felt pieces? Probably not. But if the opportunity arises, who knows!


No comments:
Post a Comment